
Managing Your Gallery
Upload, organize, and moderate the restaurant photos that appear on your public website.
Managing Your Gallery
One good photo of a plated dish sells harder than any sentence you could write. Your gallery is the visual front window of your restaurant — it sets expectations, builds appetite, and gives someone a reason to pick you over the place next door.
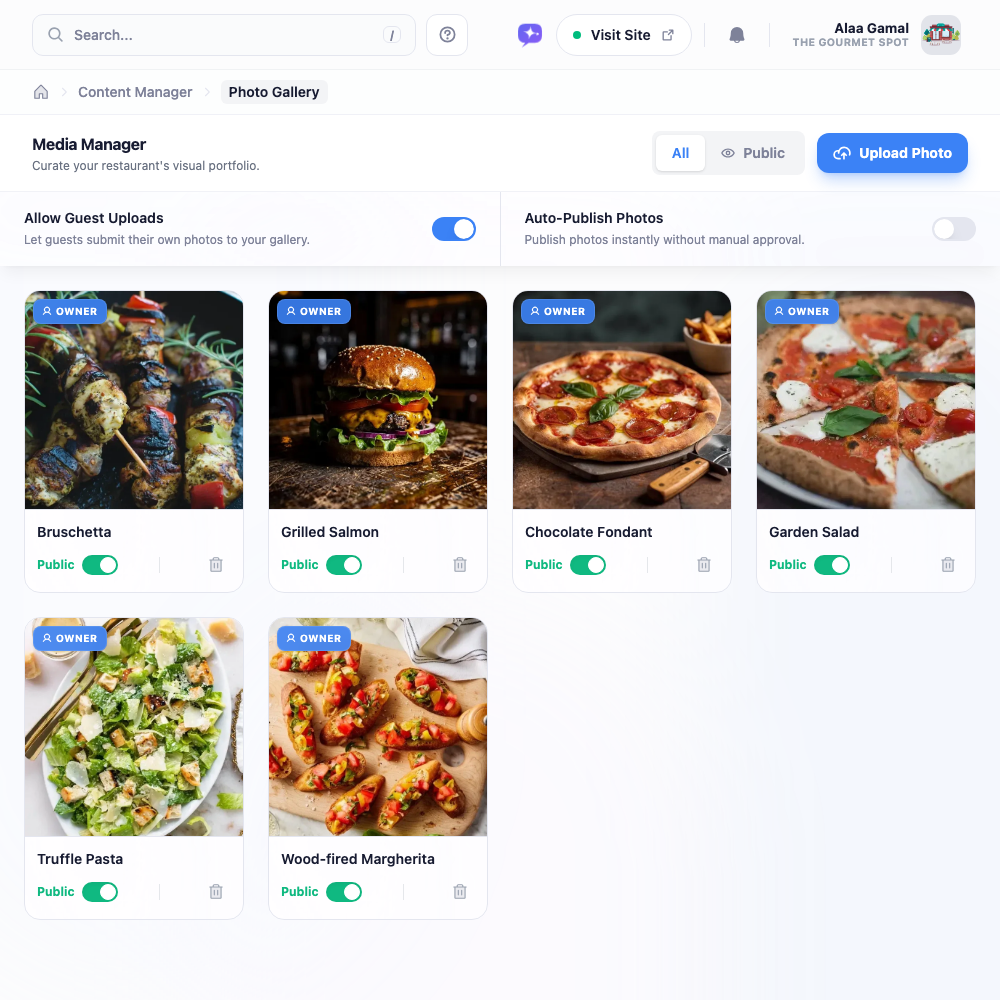
You’ll find it under Content Manager → Photo Gallery. Here’s what it looks like with a few photos in place:
Adding Photos
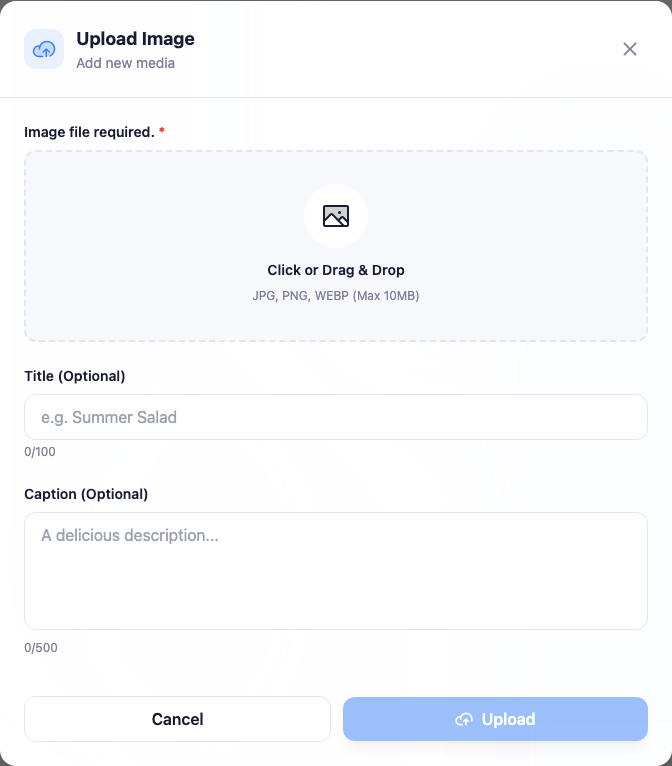
Click Upload Photo to add a new image. You can give it a title and a short caption, then upload — JPG, PNG, or WEBP, up to 10MB.
When you’re deciding what to shoot, three kinds of photo do most of the work:
- Food — your signature dishes, seasonal specials, the desserts people photograph anyway.
- The room — your dining space, the patio, the lighting, the little details that set the mood.
- Moments — a busy Friday night, live music, an event. Anything with energy.
Tip: A great gallery sells more than a paragraph ever will. Lead with your best dishes and your most distinctive spaces — a rooftop, a garden, an open kitchen.
Showing and Hiding Photos
Every photo has a visibility switch. Flip it on and the photo appears on your website; flip it off and it’s hidden — but not deleted. That’s handy for rotating seasonal shots or quietly pulling a photo without losing it.
You can also switch between grid and list views, and filter to see only what’s public or only what’s hidden — useful once your gallery grows.
Guest Photo Uploads
Some of the most convincing photos come from the people who actually eat at your restaurant. The settings bar at the top of the page lets you invite that:
- Allow Guest Uploads — lets customers contribute their own photos.
- Auto-Publish Photos — decides what happens to those guest photos. On, they go live immediately. Off, they wait in a pending queue for you to approve first.
Note: Leave Auto-Publish off to begin with. It lets you wave through the good photos and quietly drop the blurry ones before anything reaches your site. (Photos you upload as the owner are always published right away.)
Check the pending queue every so often — approve the keepers, delete the rest. Over time you’ll end up with a mix of your own polished shots and real customer moments, and that combination is more persuasive than either on its own.
Viewing and Deleting
Click any photo to open it full-screen, where you can take a closer look before deciding to publish or remove it. Deleting is permanent — it pulls the photo from both your gallery and your website with no undo, so give it a second look before you confirm.
Keep the gallery current. Refresh it when you change the menu, redecorate, or host something special. A gallery full of dated photos quietly tells people the restaurant has stopped paying attention — exactly the opposite of what you want it doing.