Adding and Managing Staff
Give your team their own logins with limited access — no sharing the owner account.
Adding and Managing Staff
Handing your owner login to employees is a risk waiting to happen — one person leaves and suddenly you’re changing the password for everyone. Staff accounts solve it cleanly: each teammate gets their own login with only the access they need.
Why Separate Logins Matter
- Security — when someone leaves, you revoke their access alone, without disrupting anyone else.
- Less exposure — floor staff never touch billing, branding, or your subscription.
- Clarity — everyone sees the tools for their job and nothing they don’t need.
Where Staff Live
Go to Settings → Staff & Roles to see everyone with access. A usage badge at the top shows how many seats you’ve used against your plan’s limit, and you can view the team as a list or a grid of cards.
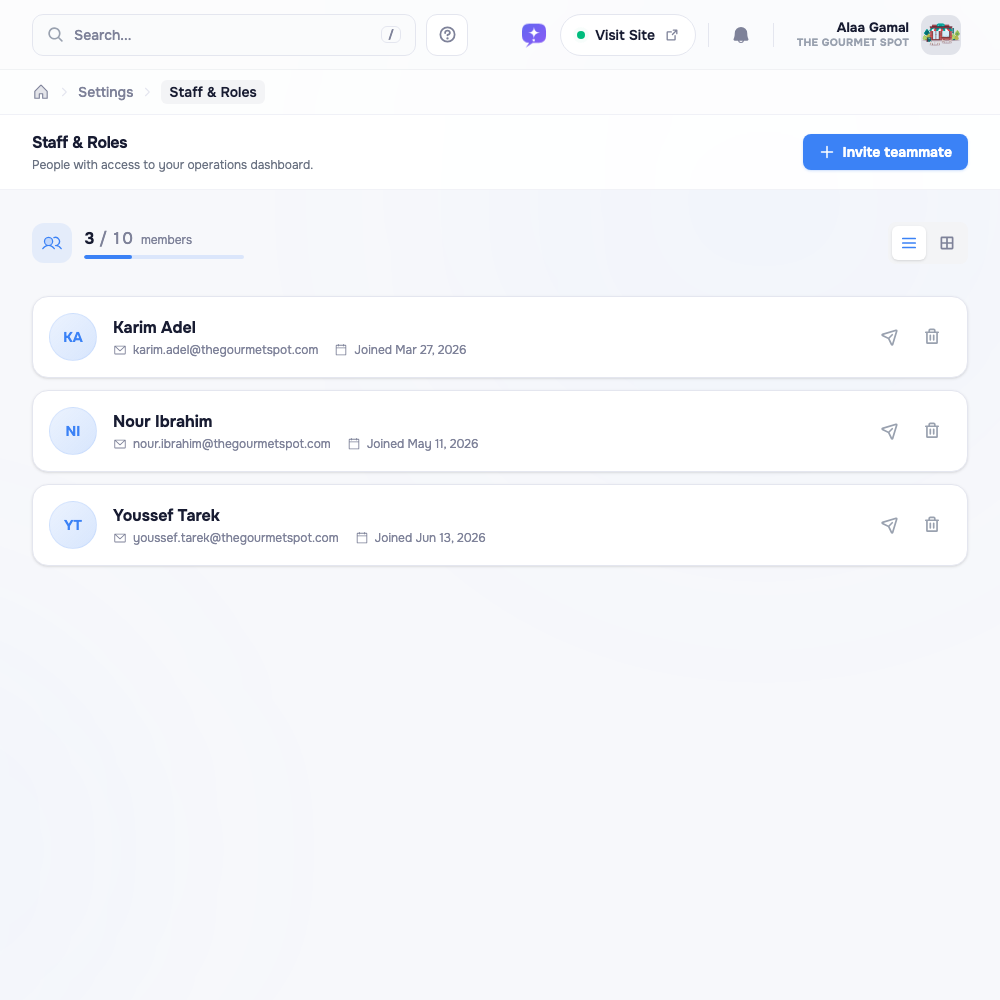
Each row shows the person’s name, email, and when they joined, plus two quick actions: resend their invite (the paper-plane icon) and remove them (the trash icon).
Inviting a Teammate
Click Invite teammate in the top-right and fill in two fields:
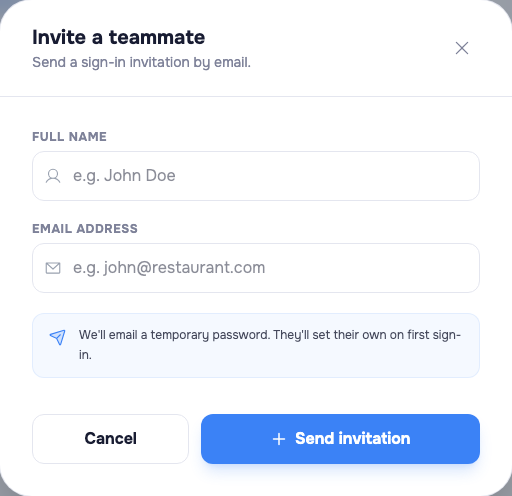
- Enter their full name and email address.
- Hit Create account.
Lekro emails the invitation for you — a temporary password they’ll use to sign in the first time, after which they set their own. You never handle or share a password yourself. If the email gets buried, tap the resend invite icon on their row to send it again.
Note: An email address can only belong to one restaurant’s staff. If it’s already in use elsewhere, the invite is declined — use a different address for that person.
Roles and Access
Staff accounts sign in to a focused, operations-only view — things like incoming orders and waiter calls — while your owner account keeps full control of the menu, branding, billing, and every setting. Your core configuration stays protected no matter how many people you bring on.
Removing Someone
When a teammate moves on, find their row and tap the remove icon, then confirm.
Warning: Removing a staff account is immediate and permanent — they lose dashboard access the moment you confirm, and it can’t be undone. Do it promptly when someone leaves.
Good Habits
- One login per person. Never let staff share an account — individual logins are the whole point.
- Remove on the way out. Revoke access the day someone leaves, not “eventually.”
- Mind your seats. Each plan includes a set number of staff seats; the usage badge tells you where you stand before you hit the limit.
Tip: Set up an account for your shift manager so they can run orders and waiter calls during service — without ever seeing billing or branding.