
Using Modifiers
Add extras, sizes, and customization options to your menu items.
Using Modifiers
Every restaurant has dishes that come with choices: What size? Which toppings? How spicy? Modifiers let you capture those options digitally, so customers see exactly what’s available and your kitchen gets clear, complete orders. They also lift your average order value — when someone sees “Extra cheese +$1” right there on the screen, they’re far more likely to say yes.
This guide covers modifiers end to end: what they are, how to build a modifier group, and how to attach groups to the dishes they apply to.
What Are Modifiers?
A modifier group is a single question you attach to a menu item — the kind of thing a waiter would ask after a customer orders. Each group holds a set of choices, and each choice can carry an optional price change:
- Choose Your Size — Small, Medium (+$2), Large (+$4)
- Add Toppings — Extra Cheese (+$1), Mushrooms (+$1), Jalapeños (+$0.50)
- How Spicy? — Mild, Medium, Hot
Every group is one of two types:
- Required (Single Select) — the customer must pick exactly one choice (e.g. a size).
- Optional (Multi Select) — the customer can pick none, some, or all, within limits you set (e.g. extra toppings).
Getting Started
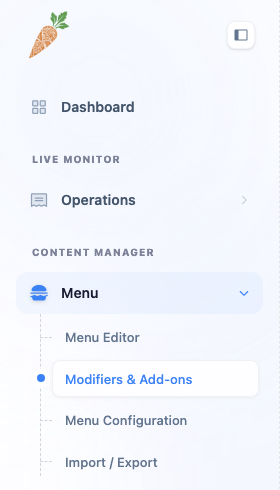
Modifier groups live on their own page. Open the Menu group in the left sidebar and click Modifiers & Add-ons. Each group you create appears as a card, showing its type (Required or Optional), its choices, and any price changes:
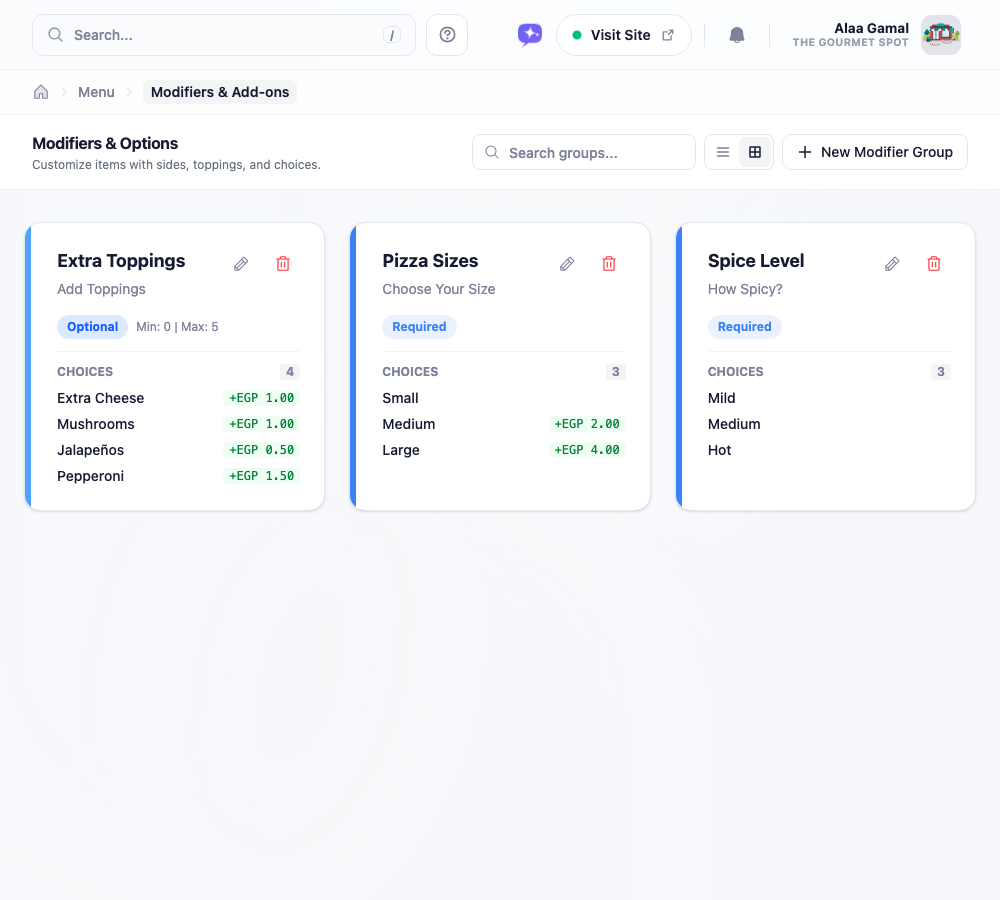
A toolbar at the top adds search and list/grid view toggles, and the + New Modifier Group button (top-right) opens the editor.
Creating a Modifier Group
Click + New Modifier Group (see the overview above). One editor handles the whole group — its settings and all its choices together:
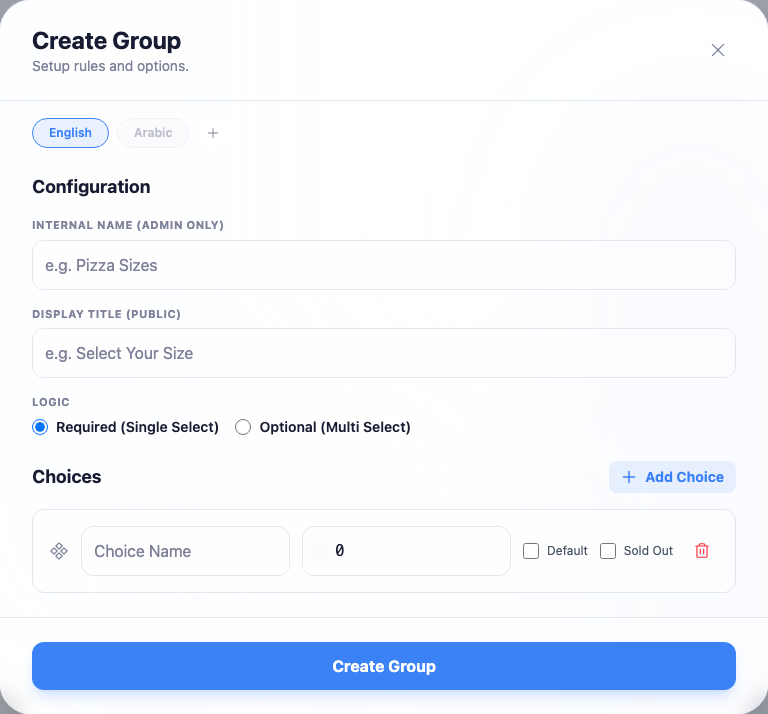
Fill in the group’s settings:
- Internal Name (Admin Only) — a label just for you, to find the group quickly (e.g. “Pizza Sizes”). Customers never see this.
- Display Title (Public) — the question customers actually read on your menu (e.g. “Choose Your Size”). Add it in Arabic too via the language tab at the top — or use Auto-Translate to fill it in.
- Logic — pick Required (Single Select) or Optional (Multi Select). For an optional group, set the Min and Max number of choices a customer may select (leave Max blank for unlimited).
Then add the Choices. Click + Add Choice for each one and enter:
- Choice Name — e.g. “Large” (translatable, just like the title).
- Price — the amount this choice adds to the item’s base price. Enter
0if it’s free. - Default — pre-selects this choice for the customer.
- Sold Out — temporarily hides the choice without deleting it.
Click Create Group when you’re done. The new group appears on the Modifiers page.
Note: Prices are additions to the item’s base price. If a pizza is $10 and the “Large” choice adds $4, the customer pays $14.
Assigning Modifiers to Items
Creating a group doesn’t attach it to anything yet — groups are reusable, so you link them to the dishes they apply to. One “Choose Your Size” group can serve every pizza; one “How Spicy?” group can serve every curry.
To link a group, open a dish in the Menu Editor (Menu → Menu Editor) and scroll to the Customization & Modifiers section. Click Link Modifier Group and tick the groups that apply:
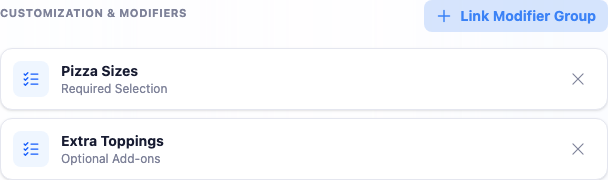
Save the item, and customers will see those options whenever they open the dish on your website. Link as many groups to a dish as you need — a pizza might use both Choose Your Size and Add Toppings.
Managing Your Groups
As your list grows, the toolbar on the Modifiers page keeps it manageable:
- Search finds a group by name.
- The list / grid toggle switches between a compact list and the card grid.
- Each card has edit (pencil) and delete (trash) buttons.
Warning: You can’t delete a group while it’s still linked to menu items — the dashboard will tell you which items use it. Unlink it from those items first, then delete the group.
Best Practices
- Keep titles short and clear. “Choose Your Size” beats “Please Select Your Preferred Size”.
- Don’t overload a group. Three or four spice levels are plenty; ten is overwhelming.
- Reuse groups across items. Build one “Choose Your Size” group and link it everywhere, rather than recreating it per dish.
- Use small upcharges. Inexpensive add-ons (extra sauce for $0.50) are easy yeses that quietly raise your order value.
What’s Next?
With categories, items, and modifiers in place, your menu is fully built. If you serve a bilingual audience, head to Translating Your Menu to make sure every word — including your modifier titles and choices — reads naturally in both languages.