Configuring Reservation Settings
Set up tables, hours, booking rules, deposits, and your guest booking page.
Configuring Reservation Settings
Before guests can book, you tell Lekro how your restaurant actually runs — what tables you have, when you take bookings, and the rules in between. You set this up once, and the booking page enforces it automatically: no double-bookings, no parties of twelve squeezing into a two-top, no requests for a Monday you’re closed.
Where the Settings Live
Open Operations → Reservations and switch to the Settings tab. A nav rail down the side groups everything into three areas, with a small status chip next to each so you can see what’s already configured.
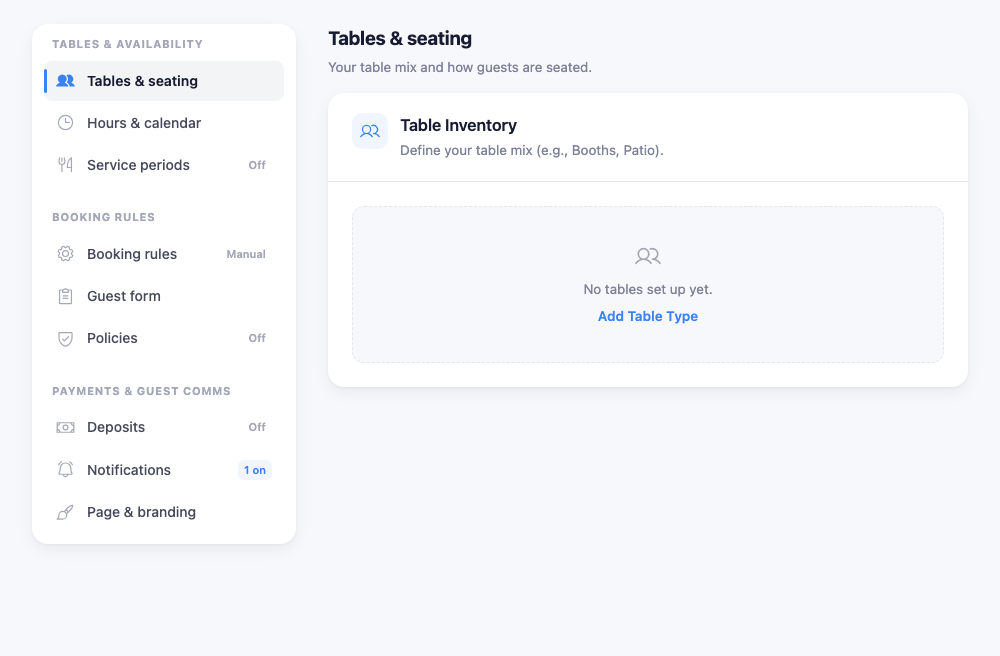
Changes don’t save as you click — adjust whatever you need across the tabs, and a Save preferences bar appears at the bottom once something’s changed. Here’s what each tab controls.
Tables & Availability
- Tables — your table mix: how many of each size you have. This is what stops the system from accepting more bookings than you can actually seat at once. Set this up first; nothing else works well without it.
- Hours — the days and times you accept online bookings. You can use one universal schedule or set different hours per day.
- Service periods — named windows like Lunch and Dinner, so bookings line up with how your kitchen actually runs the day.
Booking Rules
- Rules — the core controls: auto-confirm (bookings go straight to Confirmed) versus manual approval (they wait as requests), how far ahead and how close to the slot guests can book, party-size limits, and how long a table is held per booking.
- Guest form — what guests fill in when they book. Toggle optional fields like occasion, seating preference, and special requests on or off.
- Policies — cancellation cut-offs, reminder timing, and how long after a missed slot a booking auto-marks as a no-show.
Payments & Guest Comms
- Deposits — take a card hold or an upfront deposit to secure a booking. Off by default; turn it on to cut no-shows on your busiest nights. (Requires a connected payment account.)
- Notifications — the email alerts that land in your inbox when bookings come in.
- Branding — the copy guests see on your booking page, so it reads in your restaurant’s voice rather than a generic form.
Tip: Start simple — set your Tables and Hours, leave auto-confirm off so you approve each booking by hand at first, and add deposits or service periods later once you see how bookings flow.
A Sensible First Setup
- Add your tables so capacity is real.
- Set your hours to match when you actually seat guests.
- Decide auto-confirm on or off — manual is the safer place to start.
- Tidy the guest form and branding so the booking page feels like yours.
- Hit Save preferences.
That’s enough to take bookings with confidence. Everything else — service periods, deposits, detailed policies — you can layer on whenever you’re ready, and each one takes effect the moment you save.