Creating Categories and Items
How to organize your menu with categories and add items with prices, photos, and descriptions.
Creating Categories and Items
A well-organized menu does more than look tidy — it helps customers decide faster and order more. When people can quickly find what they’re craving, they’re far more likely to explore extras and add-ons along the way. Lekro’s menu builder lets you structure your menu exactly the way you’d lay out a printed one, with the added power of photos, descriptions, and instant updates that go live the moment you save.
This guide walks through the menu builder from top to bottom: creating categories, filling them with items, and keeping everything organized as your menu grows.
Getting Started
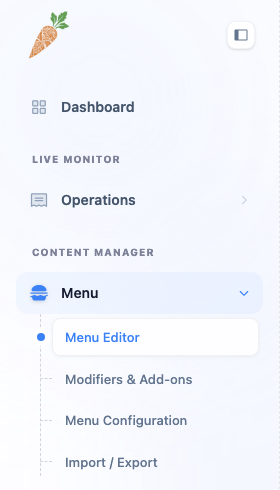
Everything starts in the Menu Editor. Open the Menu group in the left sidebar and click Menu Editor, as shown here. This is the home of your entire menu, and it’s split into two stacked panels:
- Categories sit at the top — the major sections of your menu, each with its own cover image.
- Items appear below, showing the dishes inside whichever category is currently selected.
The toolbar across the top adds search, list/grid view toggles, and one-click shortcuts like Auto-Fill Images and Auto-Translate All.
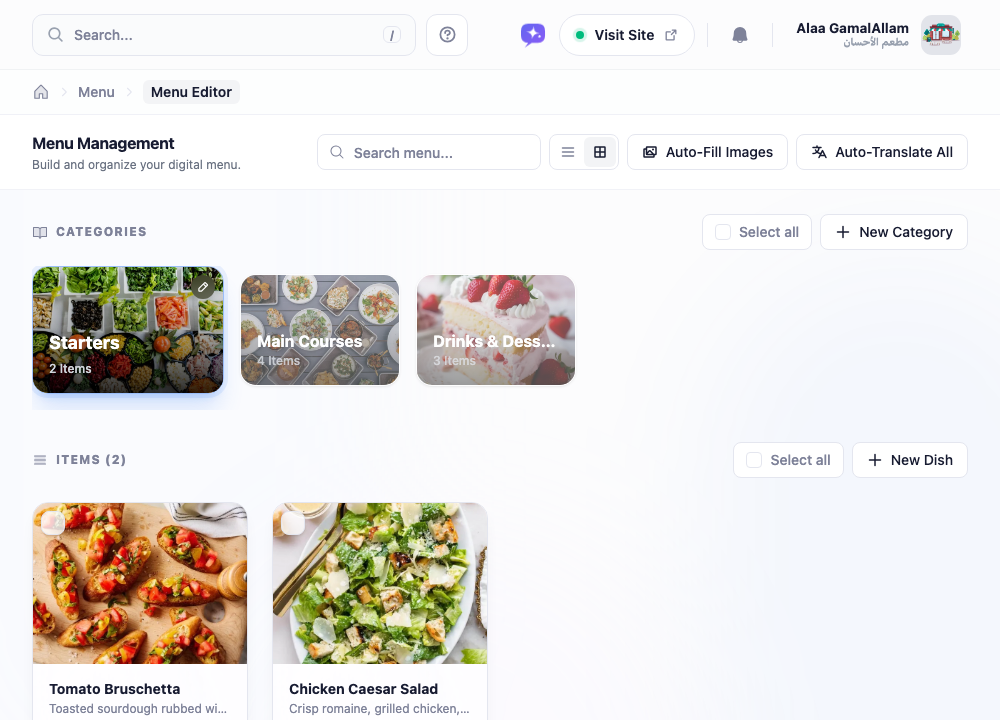
Keep this overview in mind — the steps below refer back to the buttons you can see here.
Creating Categories
Categories are the top-level sections of your menu: Starters, Main Courses, Desserts, Beverages, and so on. Every item belongs to one, so this is where you start.
Find the + New Category button in the top-right corner of the Categories panel (see the overview above) and click it. The category editor opens:
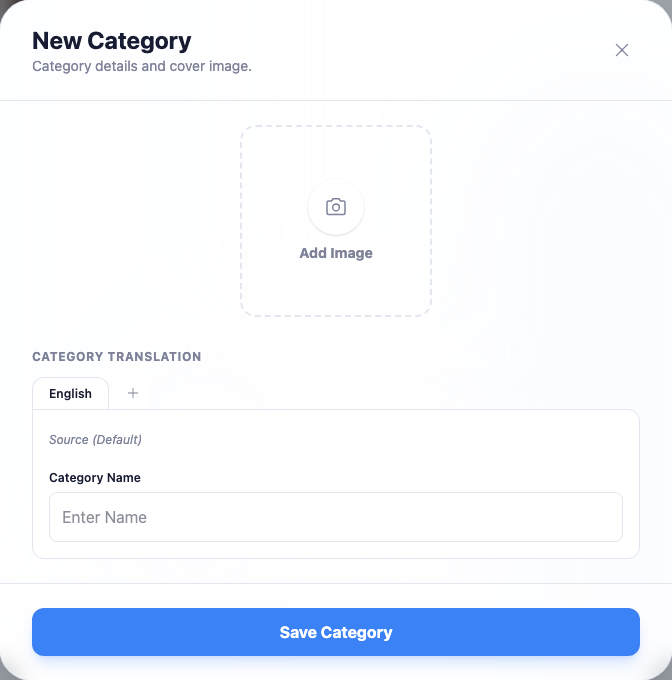
- Name your category in English. If you serve bilingual customers, click the + tab next to “English” to add the Arabic name too.
- Add a cover image (optional) — tap the image area to upload a photo that represents the section.
- Click Save Category.
Your new category appears in the categories row. To change the order, drag and drop categories into the position you want — the order here is exactly what customers see on your website.
Tip: Think about how customers naturally browse a menu — starters first, then mains, then desserts and drinks. Mirror that flow in your category order.
Adding Items
Once you have a category, it’s time to fill it with dishes.
First, select the category you want to add to from the categories row — its items load in the panel below. Then click + New Dish in the top-right of the Items panel (again, see the overview above). The item editor opens:
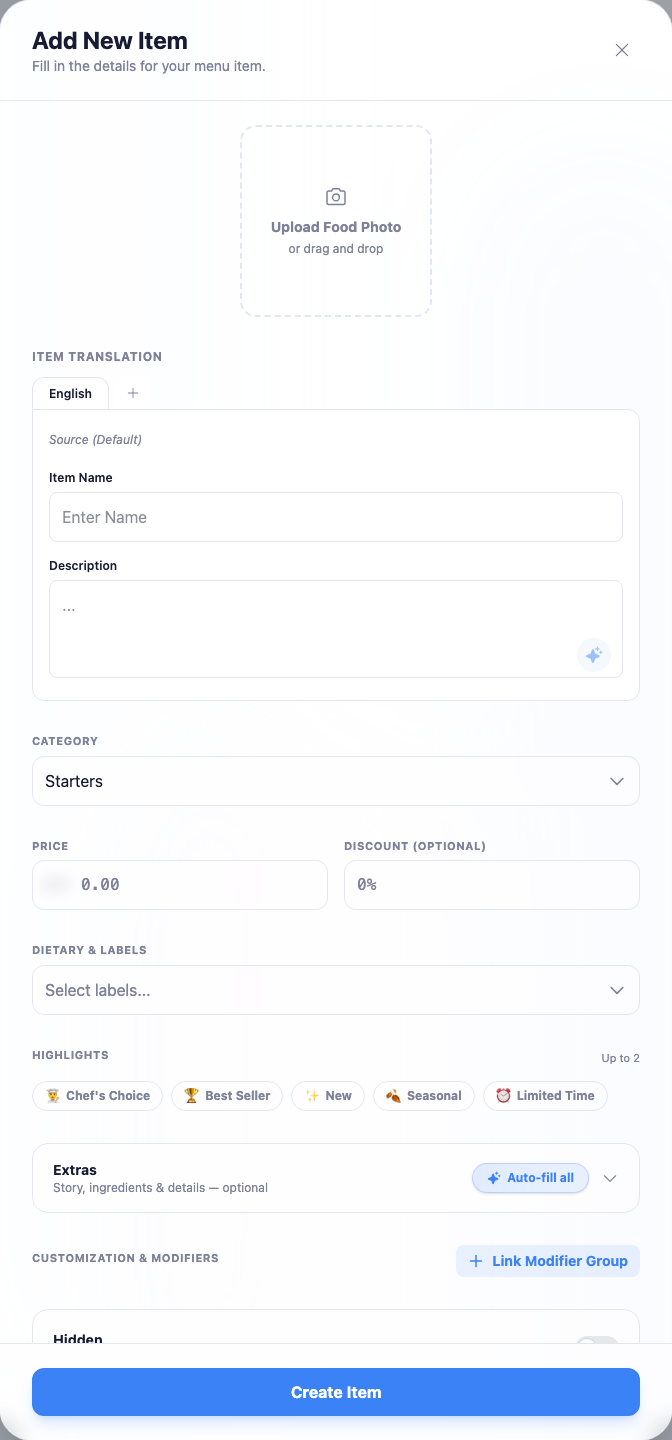
Fill in the details:
- Photo — upload an appetizing image of the dish, or drag and drop one. Well-lit photos make a measurable difference to how often an item gets ordered.
- Name (English, plus Arabic via the + tab) — the dish name as it should appear on the menu.
- Description — a short, mouth-watering sentence or two. The ✨ button can help you draft one.
- Category — confirm the dish lands in the right section (it defaults to the one you selected).
- Price — the base price. Enter the number only; your storefront adds the currency symbol automatically.
- Discount, dietary labels, and highlights (optional) — flag a dish as Chef’s Choice or Best Seller, or add labels like vegetarian or spicy.
Click Create Item and the dish appears in the category. Repeat for as many items as you need.
Tip: Items with photos attract significantly more attention than text-only ones. Even a smartphone camera works well if the lighting is good.
Reordering Items
Just like categories, items can be rearranged with drag and drop. Grab a row by its handle and move it up or down within its category — this is easiest in list view, where each item is a single, compact row.
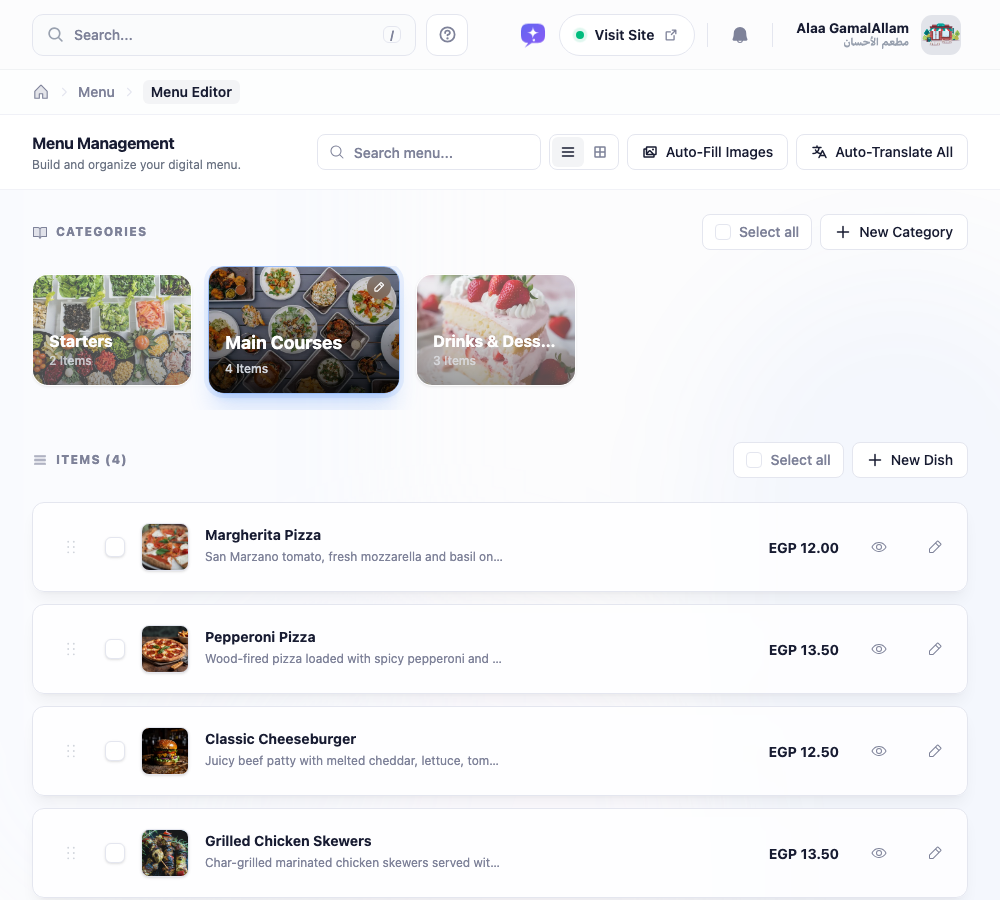
Your most popular or highest-margin dishes usually belong near the top, where they catch the eye first.
View Modes
Use the list / grid toggle in the toolbar (top-right of the items panel) to switch how items are displayed:
- Grid view shows each item’s photo as a card — great for a visual overview of the section. That’s the layout in the overview at the top of this guide.
- List view is compact and ideal for quick edits and reordering — shown just above.
Your choice is remembered the next time you open the menu builder.
Search and Filter
As your menu grows, use the search bar at the top to find items by name or description across every category. Here, searching “pizza” surfaces matching dishes instantly:
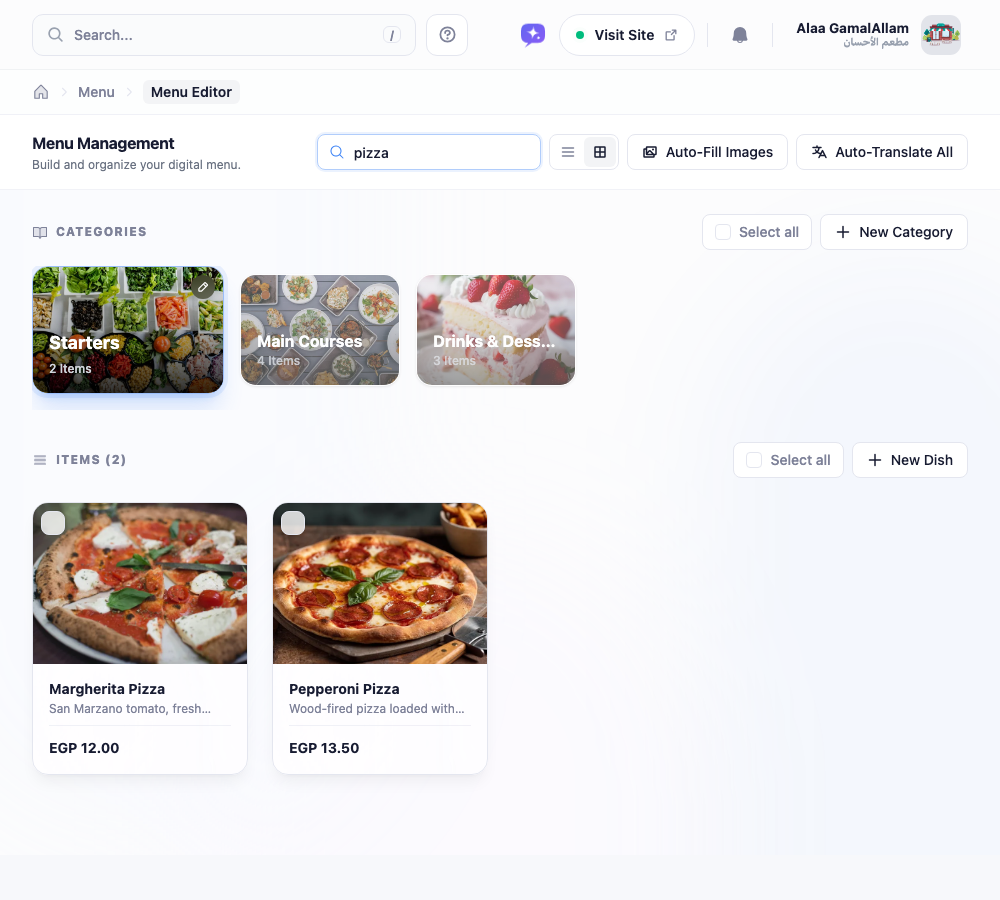
You can also click a category to focus on just its items. Together, search and category selection make a menu with dozens of dishes easy to navigate.
Bulk Operations
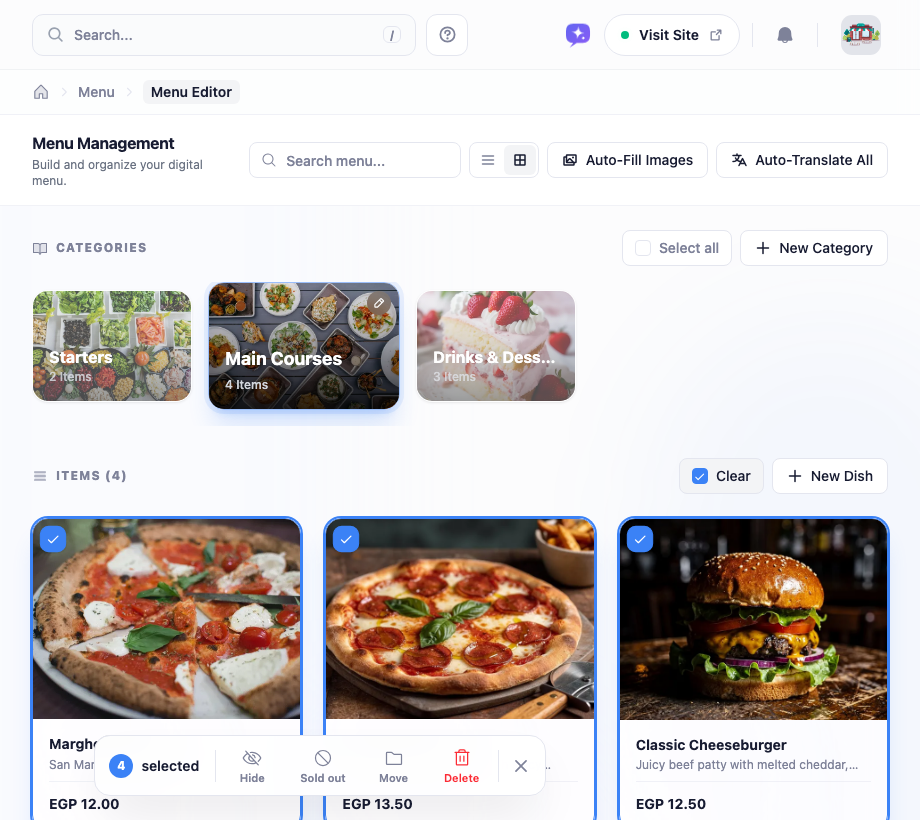
Doing a seasonal clean-up? Tick the checkbox on each item you want — or use Select all — and a floating action bar appears with bulk options like move and delete, so you can update many dishes at once instead of one at a time.
What’s Next?
With your categories and items in place, consider adding modifiers — sizes, extras, and cooking preferences — to give customers more choice. And if your site is bilingual, Translating Your Menu helps make sure everything reads naturally in both languages.