Setting Up Your Restaurant
A walkthrough of Lekro's three-step setup wizard — identity, operations, and website features.
Setting Up Your Restaurant
When you create your account, Lekro doesn’t drop you into an empty dashboard. It walks you through a short setup wizard first — three steps that take a blank account and turn it into a working restaurant with a website, a menu, and your branding on it. The whole thing takes a couple of minutes, and nothing you enter is locked in. Every field here has a home in Settings afterwards, where you can change it whenever you like.
It’s worth getting to know this wizard, because it comes back every time you add another restaurant to your account.
Here’s the shape of it. The first step is your brand identity: name, tagline, logo, cover. The second is the operational layer: language, currency, timezone, and how customers reach you. The third is your website, where you choose which pages and features the public site includes. A progress bar across the top keeps track of where you are, each step saves with a button at the bottom, and you can go Back at any point. Steps two and three can be skipped if you’d rather fill them in later.
Step 1: Brand Identity
This first step is where your restaurant gets a face. There’s a live preview card at the top, and it updates as you type, so you’re never guessing how the pieces fit together — the name, the tagline, and the images all settle into place in front of you.
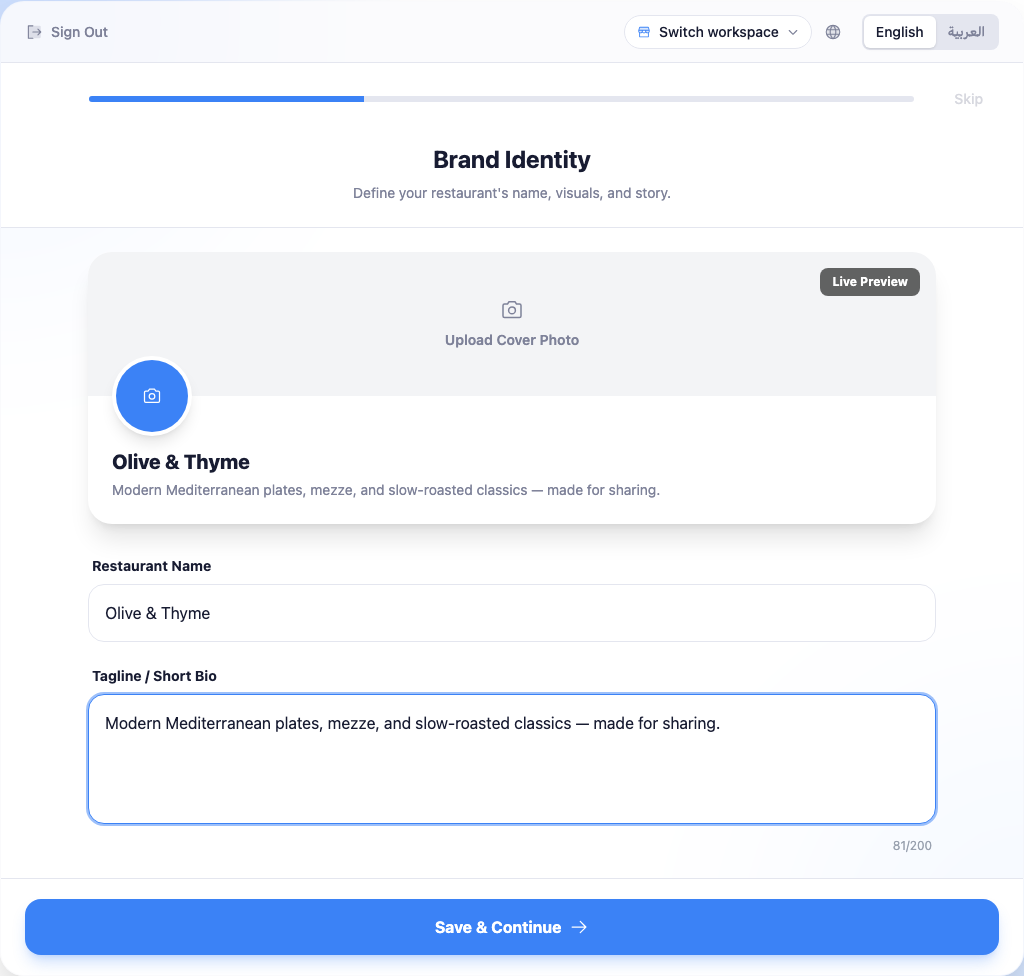
The name is the only thing you have to fill in to move on, so type it exactly as you want it read on your site and menu. The tagline underneath is one sentence, up to 200 characters, that sums the place up; it turns up on your homepage and in search results, so it’s worth a moment’s thought, but you can rewrite it later. The two image slots — a wide cover photo and a round logo — open an uploader when you click them. A square image sits best as a logo, and the cover wants a sharp, high-resolution shot, like your dining room or a signature plate.
If you don’t have good images ready, don’t let that hold you up. Continue without them and add them later from Settings → Business Profile. A strong cover and logo make the biggest difference to first impressions, but they aren’t worth stalling the setup over.
When the preview looks right, click Save & Continue.
Step 2: Operations & Contact
Step two is the practical layer: where your restaurant operates and how people get in touch.
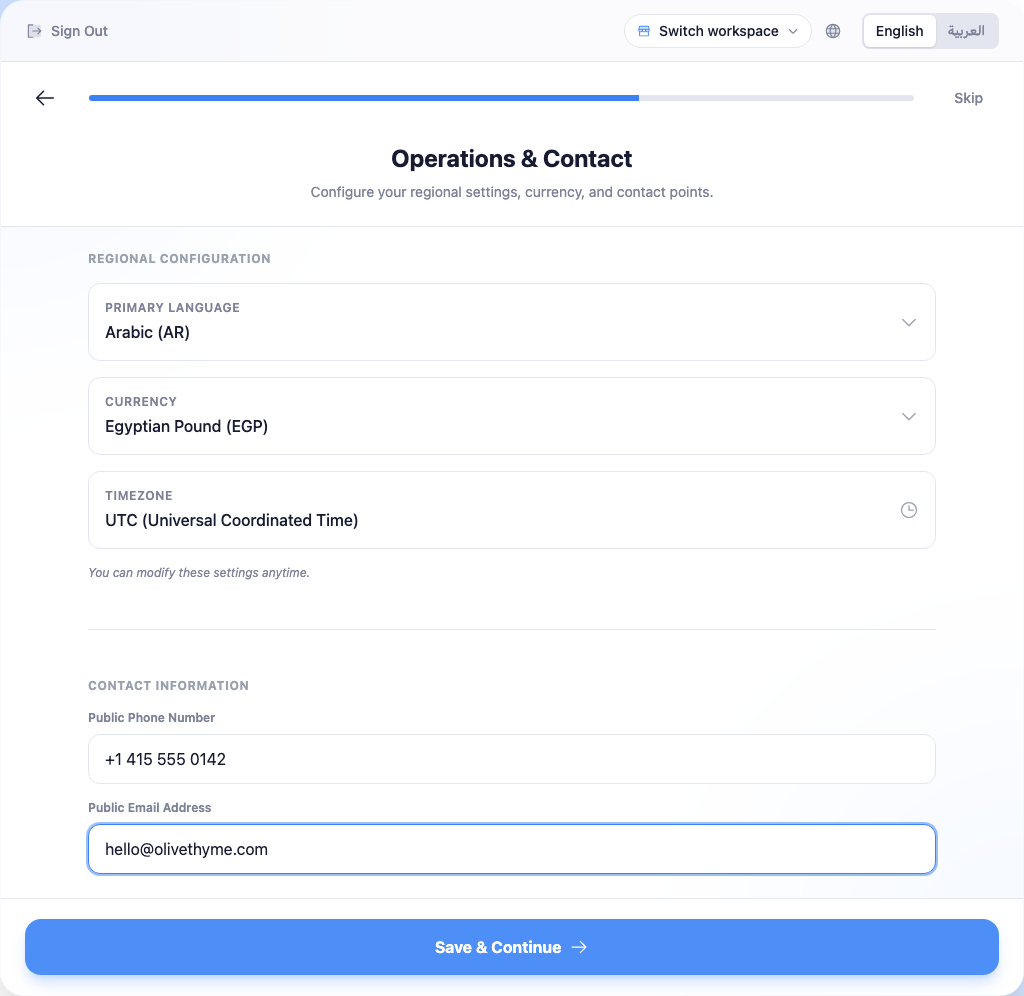
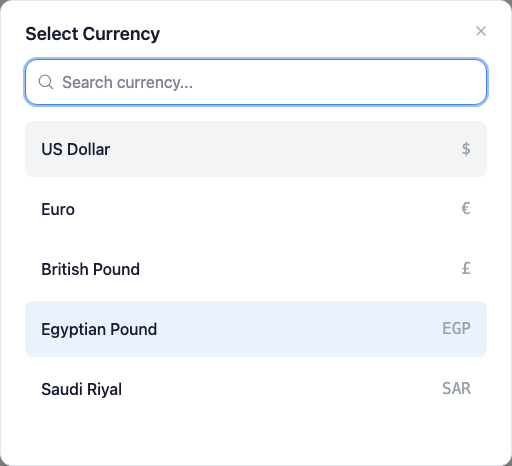
The regional settings — language, currency, and timezone — are detected from your location, so they’re usually right before you touch them. Each is tappable if it isn’t. The language you pick here is the main one for your menu and site, and you can add others later from Regional Settings. Currency opens a searchable picker, which helps since the catalogue is long, and the timezone simply keeps reservation and order times honest against your local clock.
Below that sit your public phone and public email — the ones shown on your website, not necessarily your personal lines. On mobile, the phone becomes a tap-to-call link. Both are optional, and both are easy to change later.
Step 3: Website Modules
The last step is where you decide what your public website actually contains. Each section is a toggle, and a few of them open a sub-option once they’re switched on.
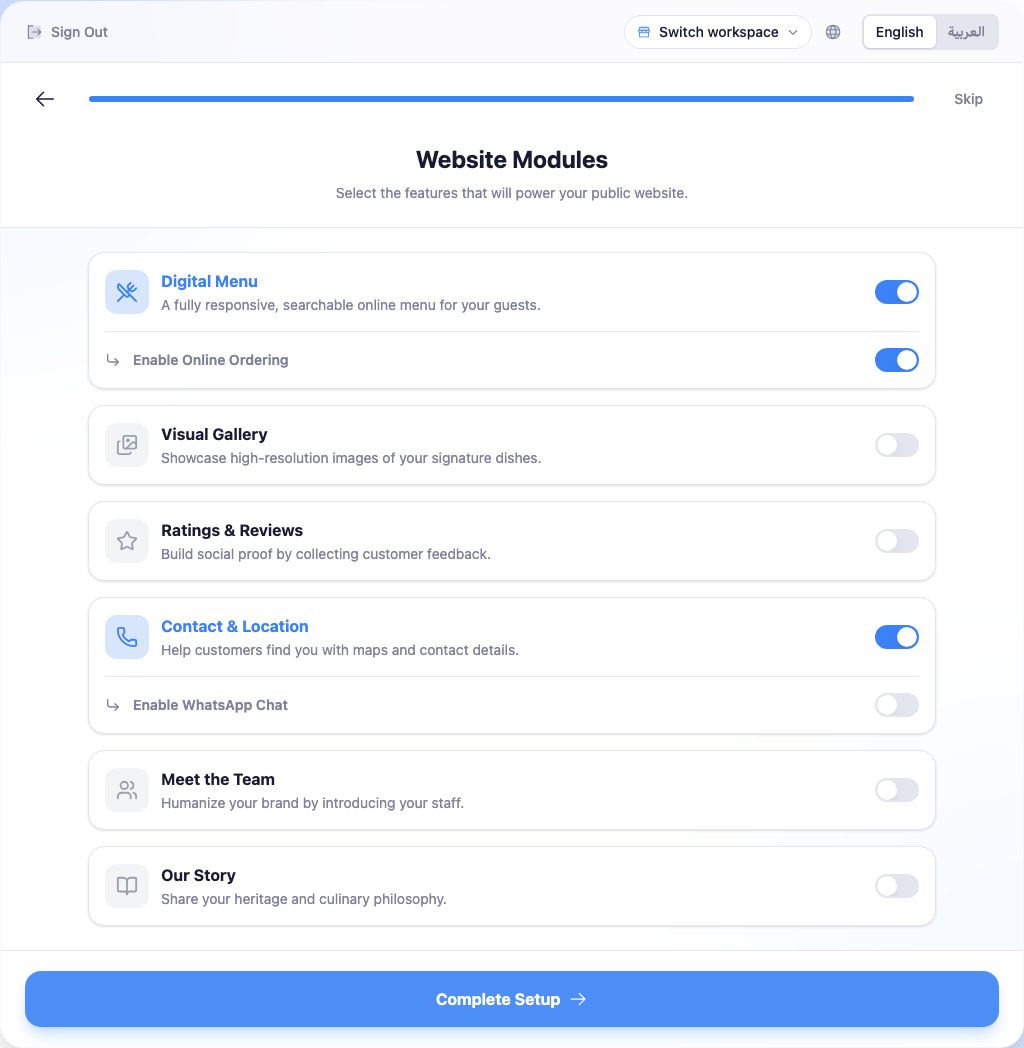
Turn on the Digital Menu and you get the interactive, searchable menu; switch on Enable Online Ordering underneath it and customers can place orders for pickup and dine-in. The Visual Gallery is a photo showcase of your dishes and space, with an option to let guests contribute their own shots. Ratings & Reviews collects feedback, and you can hold reviews for approval before they go public. Contact & Location gives you a contact page with a map, plus an optional floating WhatsApp button. Meet the Team and Our Story are the two more personal pages — your staff and your history.
How many of these you can switch on depends on your plan. If you hit the ceiling, turn one off to free up another, or upgrade later. None of it is permanent: every module here can be toggled any time from Website → Pages & Features.
Click Complete Setup when you’re happy.
After Setup
Finishing the wizard doesn’t leave you staring at a blank site. Lekro seeds the account with a sample menu and storefront, so there’s something real to look at and edit straight away instead of an empty page. And there’s no publish button to hunt for — whatever you change goes live the moment you save it.
The obvious things to do next are to start building your real menu, adjust your colors and fonts, and generate the QR codes that put the menu on your tables. If you run more than one location, adding another restaurant works exactly the way you just saw.